
In these parts, I will show and explain how to configure and use the AVI integration with NSX-T Data Center Distributed Firewall (DFW).
- Prelude : AVI SE in NSX-T Exclusion List
- Part 1 : NSX-T Security Group used as a back-end server pool
- Part 2 : Deploying SEs using NSX-T DHCP & NSX-T DFW
- Part 3 : From Virtual Service into NSX-T DFW
The version of NSX-T I used was 3.1.1 (due to old configurations, I use the Manager Policy for the DFW) and AVI 20.1.5.
When we say AVI Integration with NSX-T, it means that we create an “NSX-T Cloud” from AVI.
Official AVI Documentation related to this topic: https://avinetworks.com/docs/20.1/nsx-t-no-se-in-exclude-list/#creating-dfw-rules
Part 2 – Deploying SEs using NSX-T DHCP & NSX-T DFW
The idea with AVI SEs is to have SE groups working in Active/Active mode.
With this mode, it’s possible and we actually want our SEs to scale out (be deployed dynamically when needed).
In this post, I will show you how to configure AVI and NSX-T in order to provide SE’s management IP dynamically using NSX-T DHCP.
We will then add the mandatory rules into our NSX-T DFW in order to let our SEs reach our AVI Controllers.
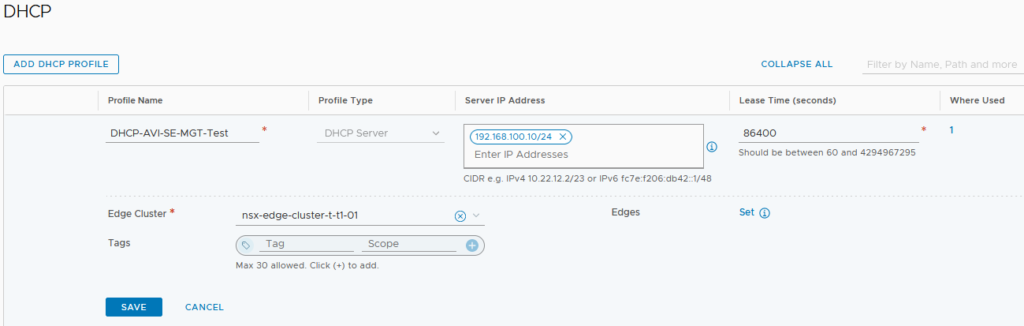
At first we need to create our DHCP Profile, as we are going to connect it directly to the T1 handling the AVI management Segment, we can attribute any no routed private IP.
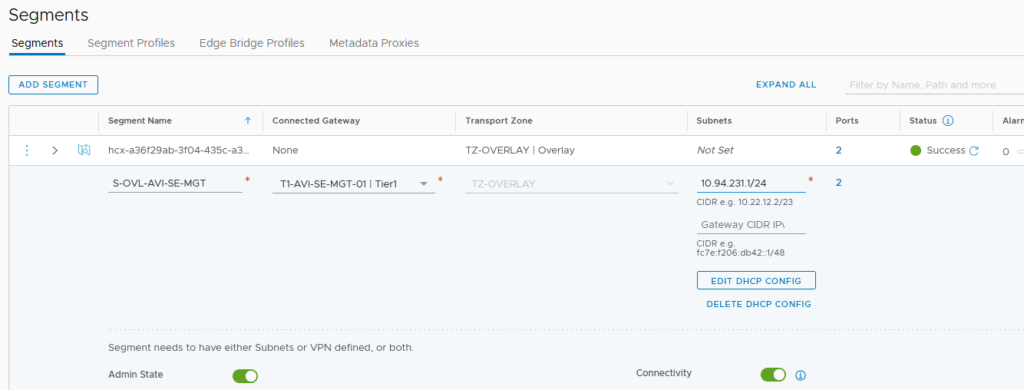
We can then create our NSX-T Segment.
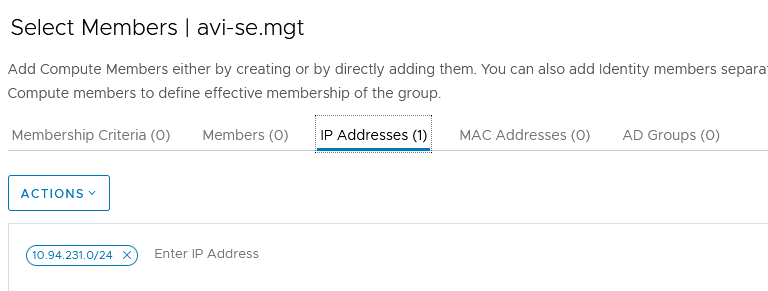
In my case, the management IPs of my SEs will be one IP within the private and routing subnet 10.94.231.0/24.
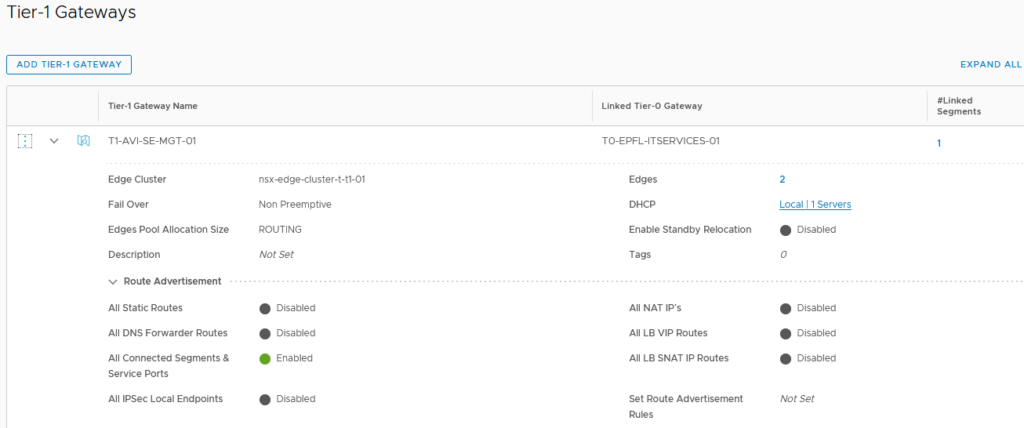
I have created a separated T1 Gateway using the same T0 and T1 Edge cluster that I’ve used for my VM traffic.
As usual, don’t forget to enable the “All connected Segment & Service Ports” under the Route Advertisement section. Doing this, you will propagate this Management Subnet route through your T0. If you allow and forward this route correctly through your T0 BGP, you will then be able to reach your SEs though SSH.
In the T1 configuration, we need to connect our newly created NSX-T DHCP.
Here our DHCP is working has a server. We can select our DHCP Profile on the drop-down menu.
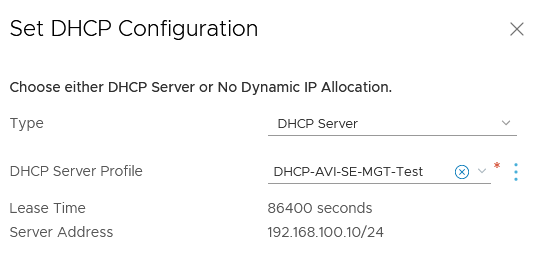
We are good with the T1, Segment and DHCP configuration!
However, if we don’t want to put our SEs in the NSX-T Exclusion List (ref. Prelude : AVI SE in NSX-T Exclusion List) and want a real integration with the NSX-T DFW, we still need to do some work from an NSX-T perspective.
For this part, the AVI integration will help us.
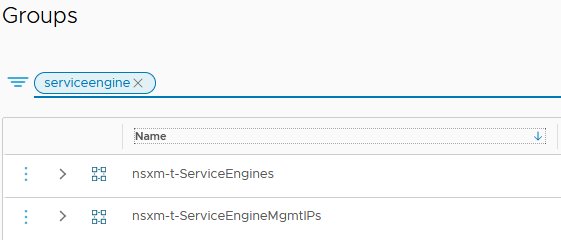
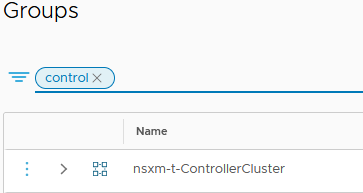
AVI create and maintain dynamically three groups extremely useful for the SEs.
NOTE: All the components created by AVI in NSX-T (Security Groups & Services) and vCenter (SEs) will have the “Object Name Prefix” attached. In my case “nsxm-t”.
The first one contains all the SE management IPs allocated in our “NSX-T Cloud”.
The second one contains all the SE VMs created and used in our “NSX-T Cloud”.
The third one contains the IPs of the AVI controllers. If you have a cluster and a VIP for your AVI controller, you will have 4 IPs in this group.
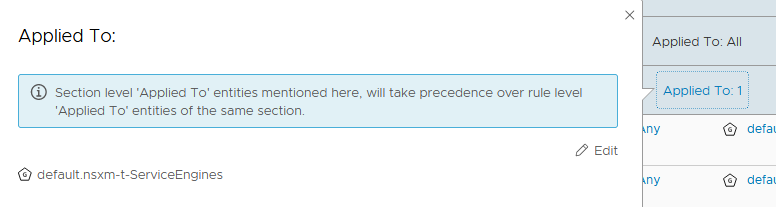
We are going to apply our NSX-T DFW Section to the second group as it contains the SE VMs.
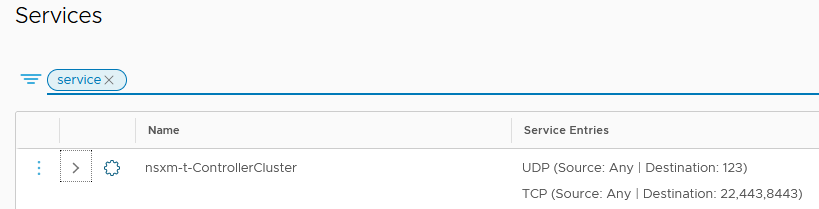
A new service has been created as well. It contains all the ports needed for the communication between SEs and the AVI Controllers.
Because we are allocating Management IP dynamically using NSX-T DHCP, we need to allow this part in our DFW as well.
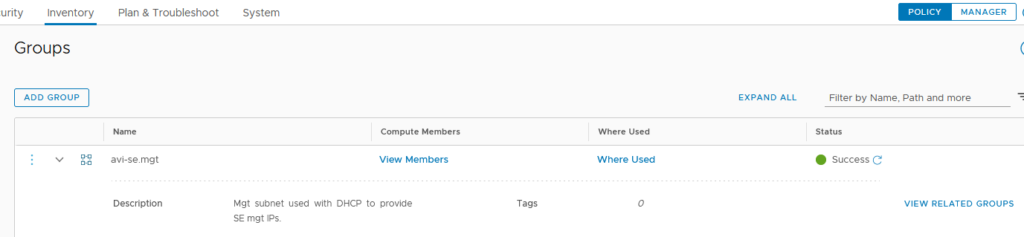
In order to do that, we need to create manually a new Group containing the subnet of our SE management Segment.
We now have all the Groups and Services needed to add the next rules:
Note: I’m working on a Whitelist FW mode meaning that I allow what I want and I have a “drop all any any” at the end of my DFW rules.
- Allowing the Management SE IPs to reach the AVI controllers IPs using the service (ports) needed.
- Allowing the DHCP protocols in our management subnet.
- (Optional) Allowing SSH from some specified IPs to reach our SE Management IPs.

We need to apply this section to the dynamic Group which contains the SE VMs.
We’re all done with NSX-T and we can jump on our AVI Controller.
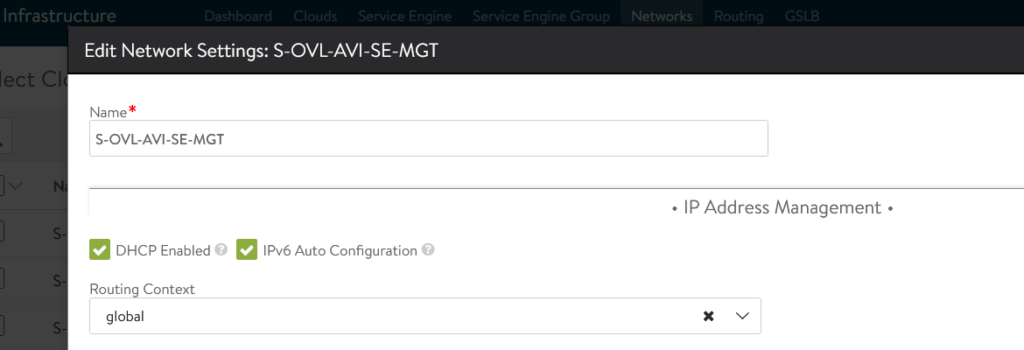
We have to define a new Network for our AVI SE Management in our NSX-T Cloud.
Go to Infrastructure -> Networks -> NSX-T Cloud -> Create a new Network.
We have to configure it in the global VRF and we don’t need to configure any Subnet or IP pool.
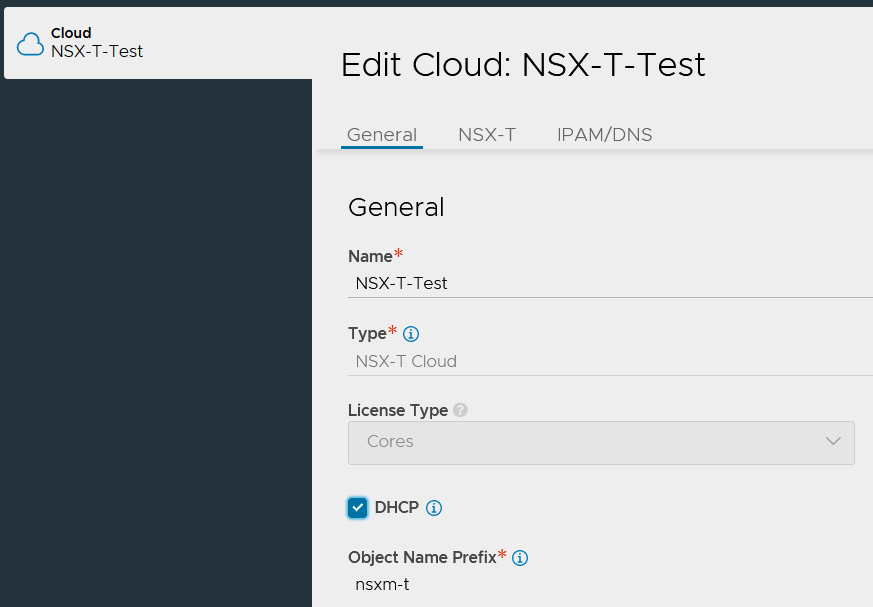
In the NSX-T Cloud configuration we need to select the DHCP parameter in order to tell AVI that the Management IPs of the SEs are going to be allocated through DHCP.
When we create our NSX-T Cloud, we need to set up an “Object Name Prefix”.
All the components created by AVI in NSX-T (Security Groups & Services) and vCenter (SEs) will have this name attached.
Warning: This name can’t be change after the Cloud creation.
Under the Management Network Section, we select the Transport Zone, T1 and Segment we have configured earlier and that it!

Let’s try it!
You want a Service Engine to be deployed automatically by AVI Controllers.
In order to do that, you need a Virtual Service.
You first need to create an SE group in the NSX-T Cloud.
Then, you need to create a new Virtual Service and assign the SE group to this VS.
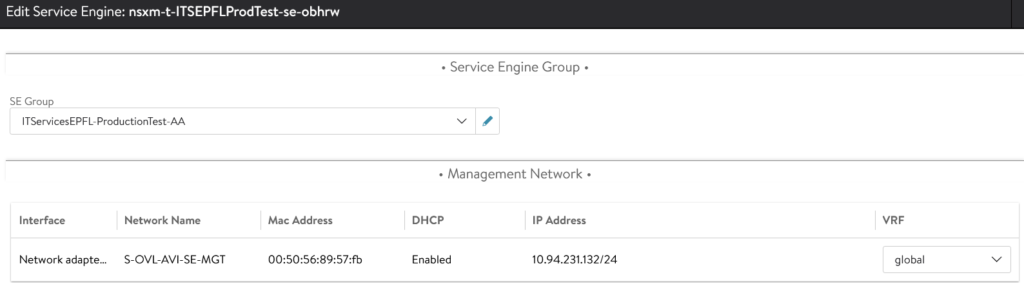
After the creation of the SE, you will see that its management IP has be allocated through our NSX-T DHCP.
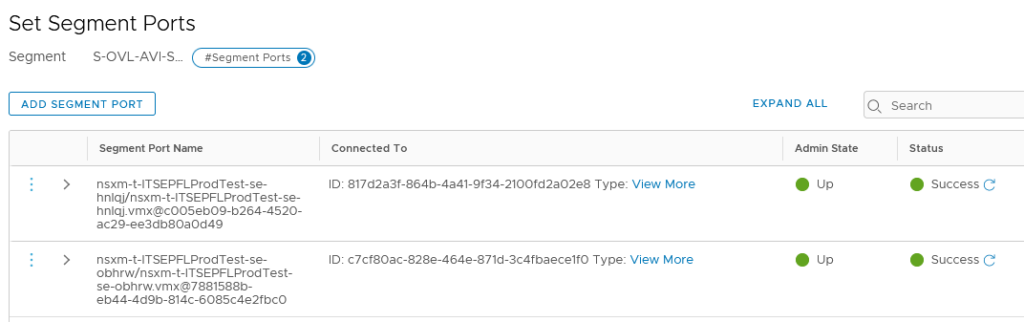
We can see the ports on the NSX-T Segment.
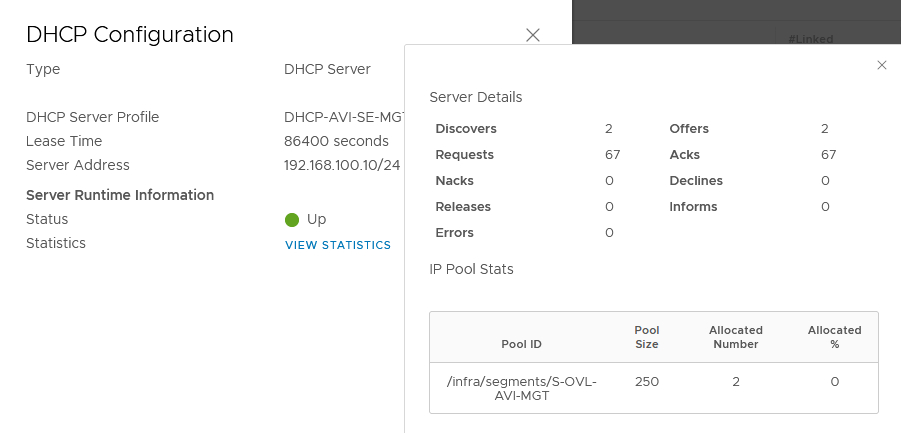
On the T1 at the DHCP configuration, we can see that 2 IPs were allocated.
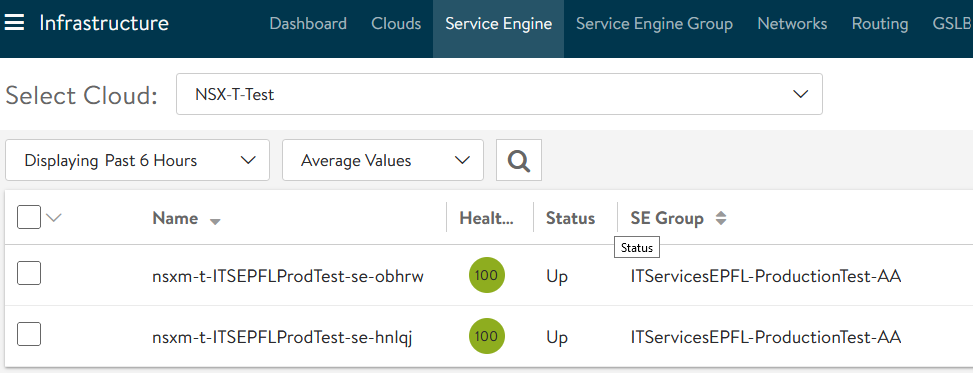
Normally your SEs will be able to reach the AVI Controller and appear as “Connected”.
You can check the connectivity between SE and AVI Controller doing an SSH on your AVI Controller.
Enter the “shell” command following with your admin user and password.
Then you can use this following command:
show serviceengine your-serviceengine-name detail
You can check the Hearthbeat status:
| hb_status | |
| num_hb_misses | 0 |
| last_hb_req_sent | 2021-Jun-03 09:18:30 |
| last_hb_resp_recv | 2021-Jun-03 09:18:30 |
| num_outstanding_hb | 0 |
As well as the counters, in order to see if there is a difference between the send and receive Hearthbeats.
| counters | |
| hb_sent_cnt | 15724 |
| hb_recv_cnt | 15724 |
| last_dp_hb_miss | 2021-Jun-01 13:37:36 |