In these two parts, I will show and explain to you how to set UP and configure a connection between you NSX-T Datacenter on-premise and an SDDC on the cloud.
- Part 1: On-premise
- Part 2: VMware Cloud on AWS
- Part 3: Filtering BGP routes
NSX-T Datacenter (On-Premise side)
Note: In these articles, I assumed people have already some knowledge about NSX-T components and are familiar with the NSX Manager UI, the edges and T0.
For privacy and security purpose, I will hide my on-premise public IP and the VMC public IP.
->If you’re asking your self where you can find the VMC public IP, have a look at the part 2 of this topic.
The version of NSX-T I used was 2.5.1 -> https://docs.vmware.com/en/VMware-NSX-T-Data-Center/2.5.1/rn/VMware-NSX-T-Data-Center-251-Release-Notes.html
I want to warmly thanks my VMware beast colleague Eric Krejci, the VMware NSX-T and VMC teams for their support.
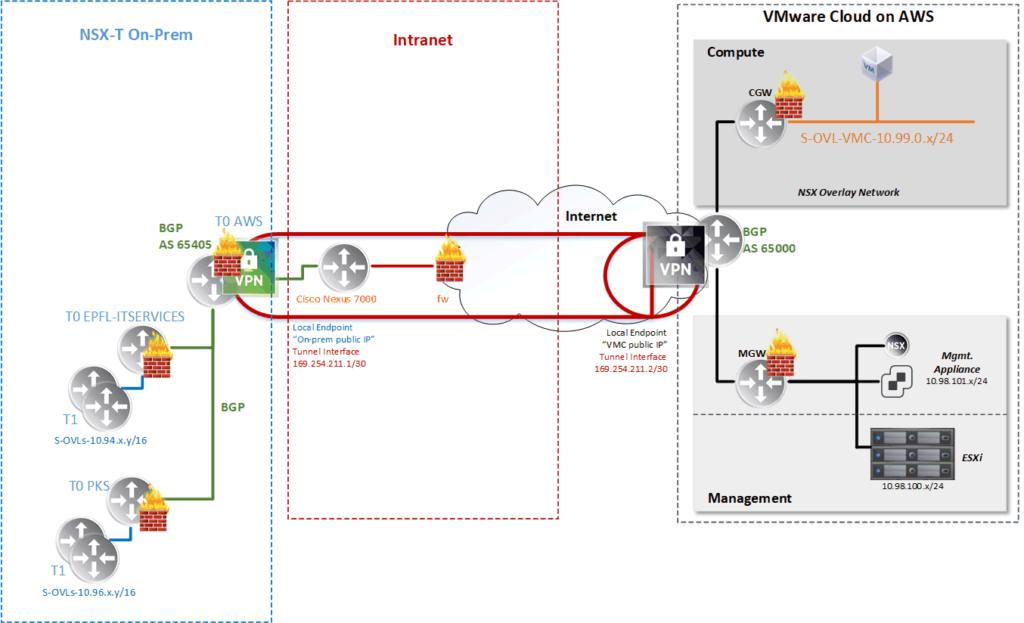
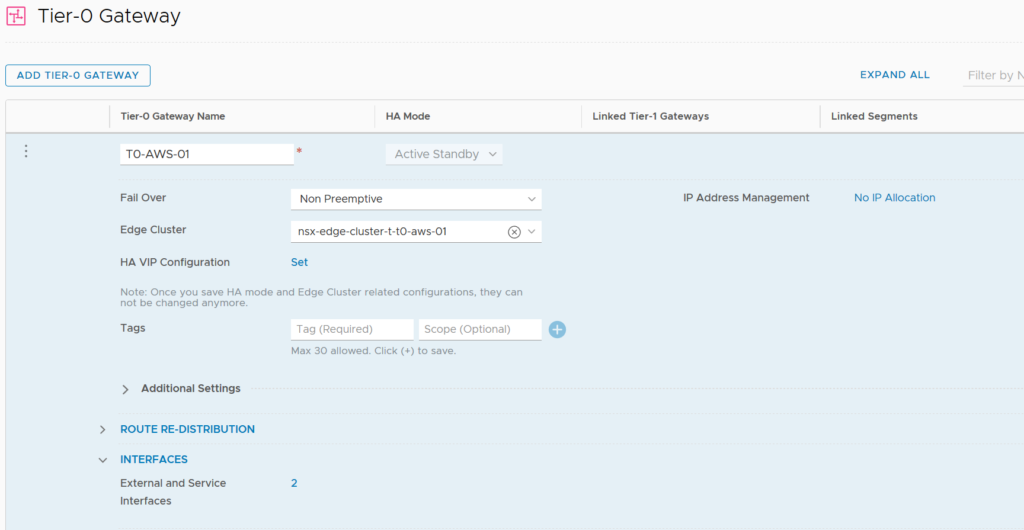
From the NSX-T side like shown in my schema above, we will have to dedicate a T0 cluster (T0 AWS) to provide the VPN service.
VPN is a state-full service which means that we need an Active-Standby T0.
In my infrastructure all my T0 are connected together and to the physical router (Cisco Nexus 7k) via BGP.
Here is my T0 operating in Active-Standby mode.
IPsec VPN configuration
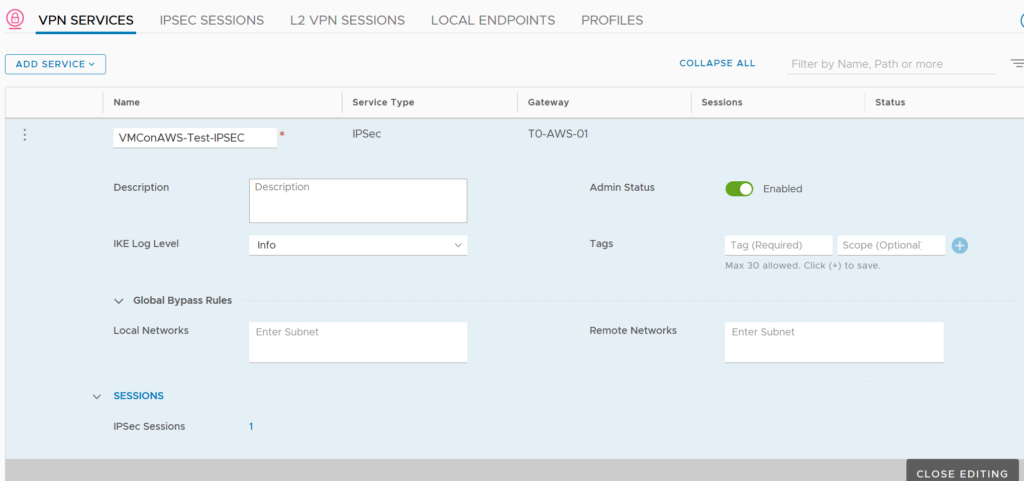
Once we have our T0, we can create and attach a VPN Service to it.
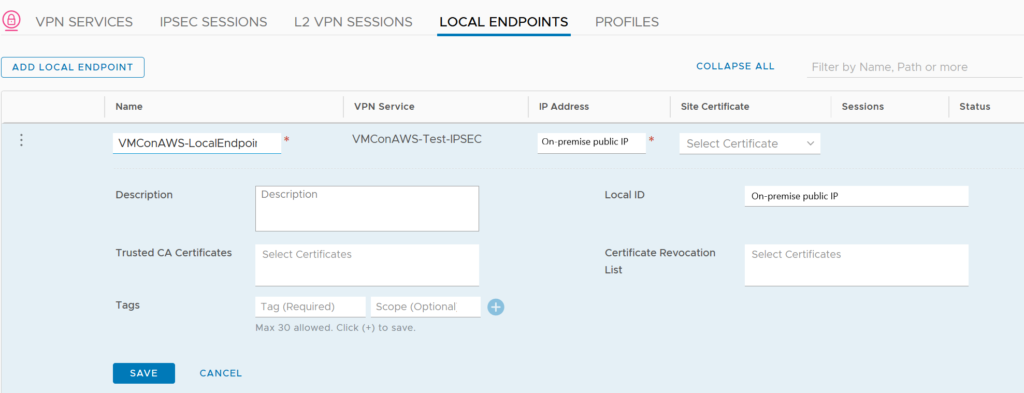
Now we have to define a Local Endpoint which will contain our on-premise public IP.
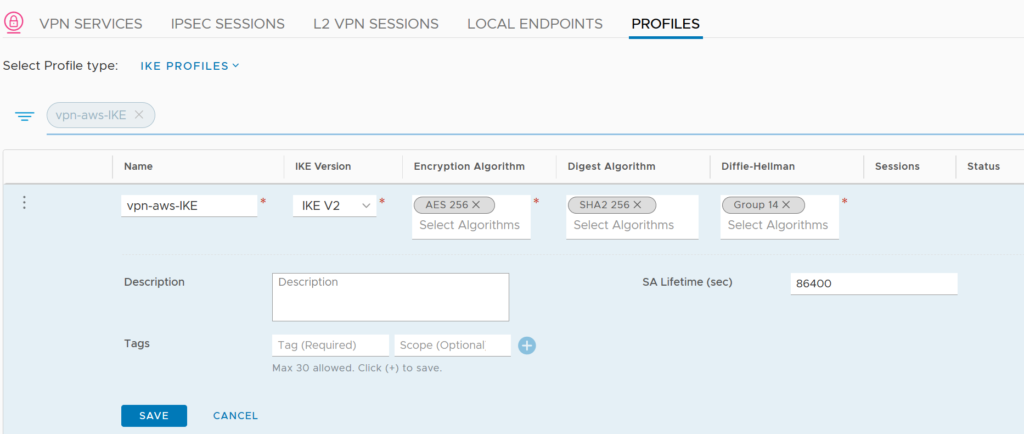
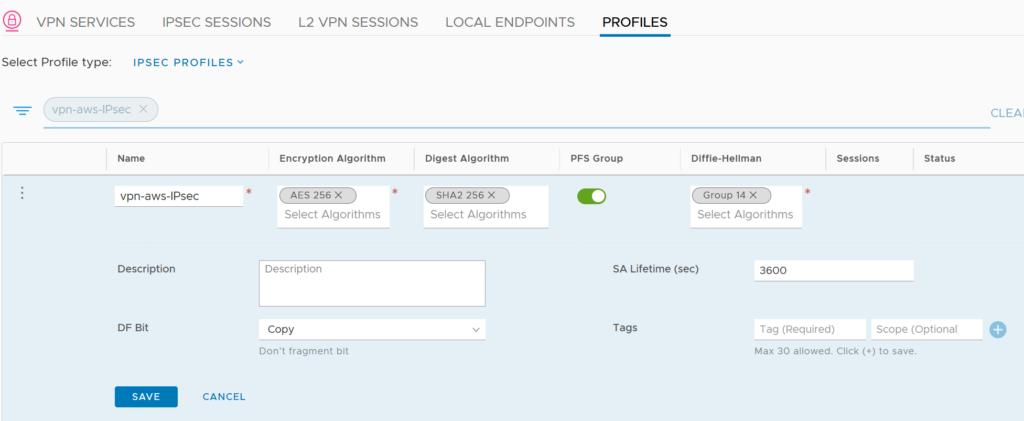
Before creating the IPSec Session, we will have to create special IKE and IPSec Profiles.
We need these custom profiles because the default ones only does AES 128 as Encryption Algorithm and to match with the default settings of VMC we need AES 256.
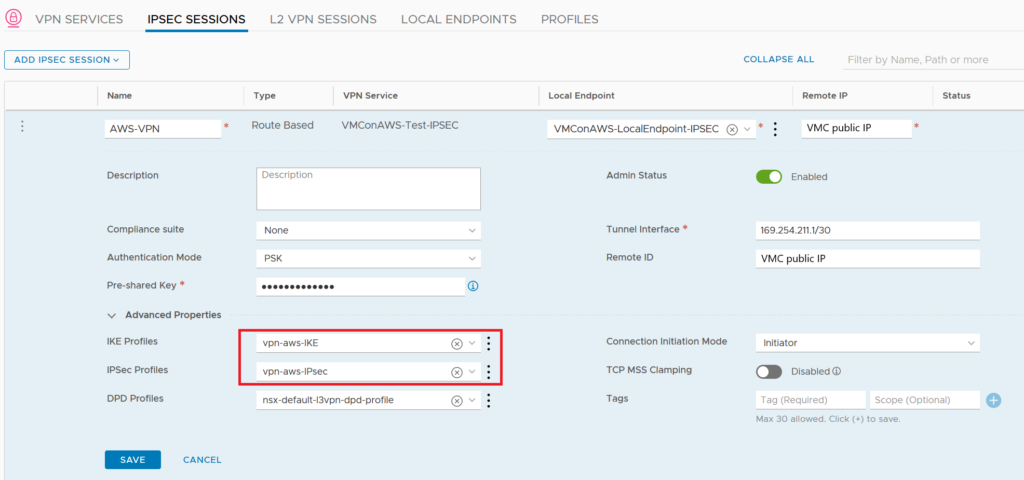
We can now create a new IPsec Session and include the Local Endpoint and profiles created previously. The important setting is the remote IP which is the VMC public IP.
Here we can add a Pre-Shared Key which has to be the same on VMC side.
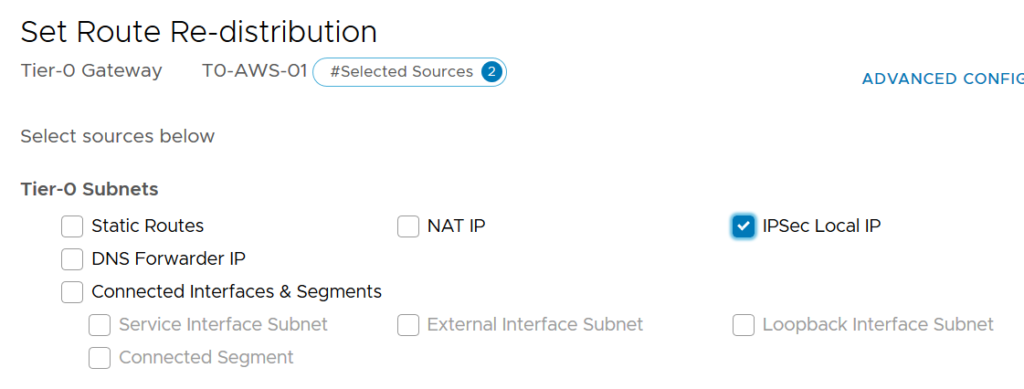
To propagate my on-premise public IP I’ve just set up into my on-prem BGP, I have to check the right box on the Route Re-distribution of my T0.
Routing BGP
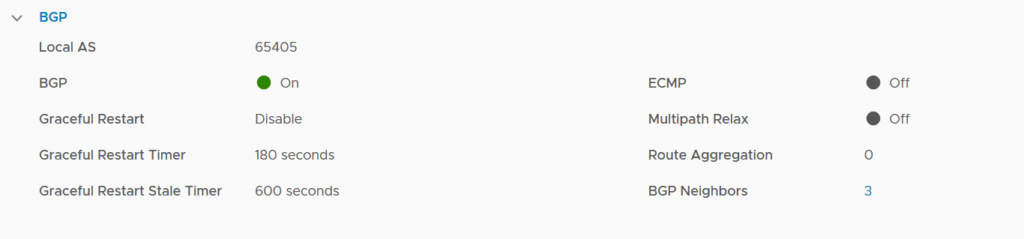
Once the IPsec VPN is UP we can now configure the BGP on our T0 in order to forward our on-premises routes and receive the VMC ones (local routed segments and management subnet).
My on-premise AS number is 65405 and the VMC one is 65000 (by default).
Because our T0 is working in Active-Standby mode some features are not available such as Equal-cost multi-path(ECMP) and Multipath Relax.
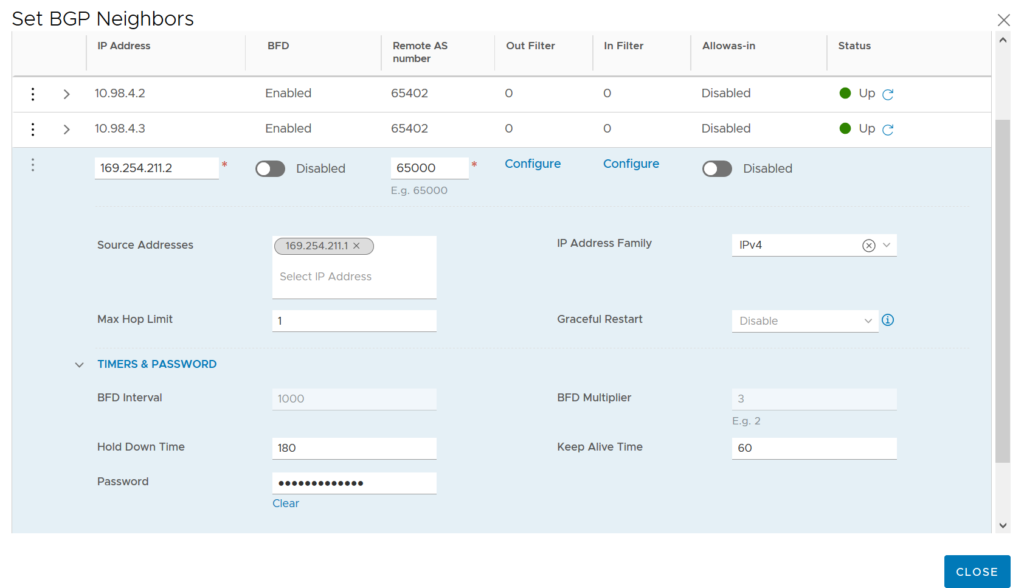
We had the corresponding BGP Neighbor with is remote AS number.
By default VMC doesn’t used Bidirectional Forwarding Detection(BFD).
The source address is the IP of our Virtual Tunnel Interface(VTI) on-premise.
We can set UP a password for this BGP session which as to be the same on VMC side.
Firewall
When we create the VPN, firewall rules are created dynamically on the T0.
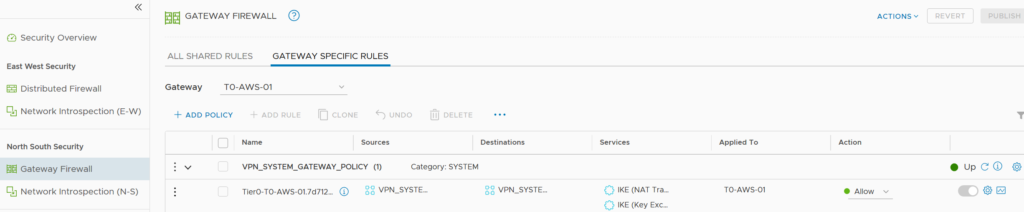
If we have an Internet Firewall or anyother on the way to the T0, it’s necessary to open the two ports added dynamically in the Gateway Firewall in NSX-T and the ESP port.
Because all the BGP traffic is inside the tunnel, we don’t need to open the BGP port.
-> https://docs.vmware.com/en/VMware-NSX-T-Data-Center/2.5/administration/GUID-DF689847-252E-451E-84B5-DB507CC010AC.html
- ESP : UDP port 50
- IKE (Key Exchange): UDP port 500
- IKE (NAT Traversal): UDP port 4500

Check-list
Once all the configuration on VMC side is done correctly (have a look at the second part if not), we should have the following behavior.
- Connecting via SSH on our on-prem T0 we are able to ping both interfaces of the tunnel.
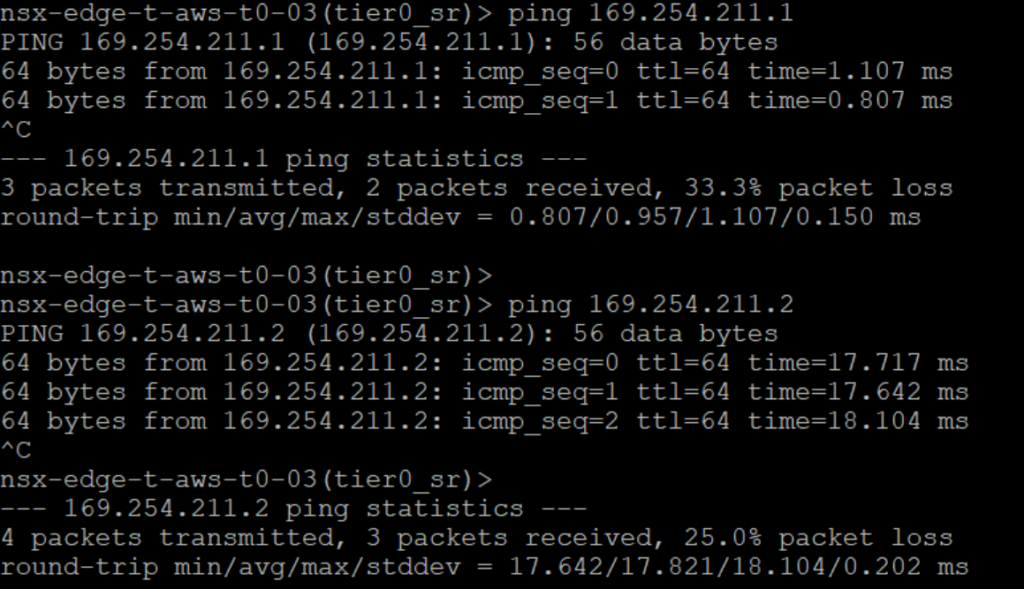
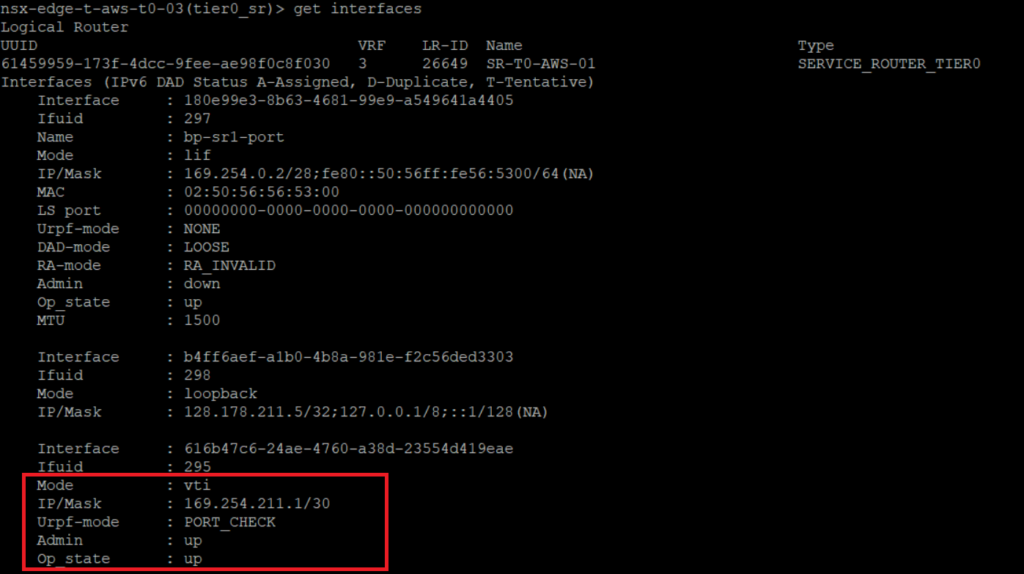
- We can see the Virtual Tunnel Interface (VTI) status.
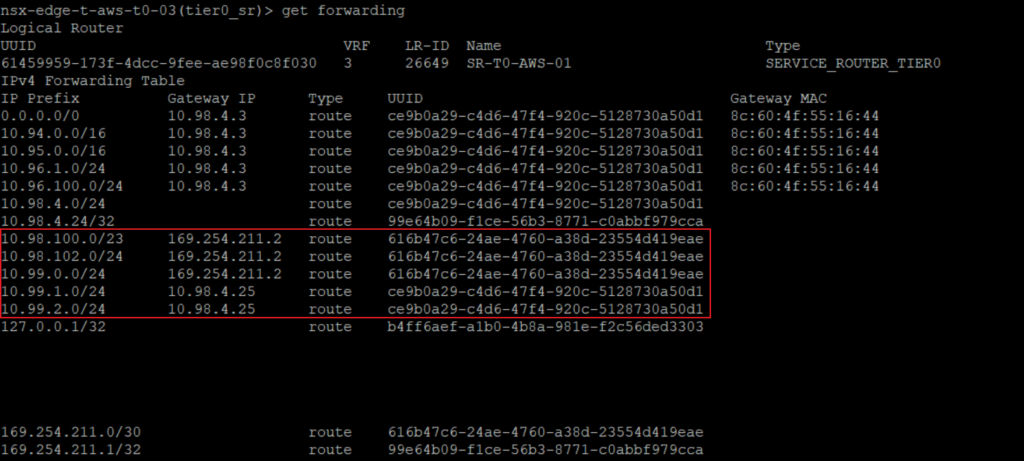
- In the route table on-premise, we can see the routes advertised through the IPsec VPN. As well as the Virtual Interface Tunnel (VTI) which is directly connected.
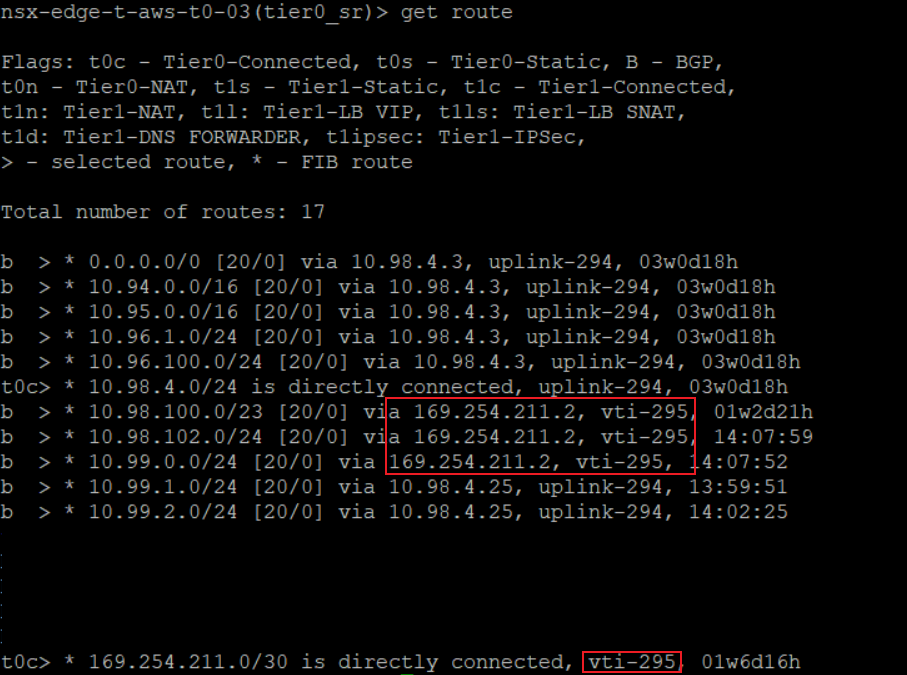
- With the forwarding table we can also check the subnets known by the T0.